

Building Visa Scope AI, Part 2: The Build Journey
Building Visa Scope AI, Part 2: The Build Journey
In no-code-plan/”>Part 1, I covered the problem validation, market research, and technology stack selection for Visa Scope AI. I’d decided to build an automated Spanish Digital Nomad Visa assessment tool using no-code platforms, and I had my seven systems selected: Carrd, Stripe, Make.com, Zoho CRM, Landbot, Google Docs, and Gmail.
This is the build story – how I actually connected those seven systems. The hardest part was figuring out how to get session tokens into Landbot securely. I wasted a week on complicated solutions before a Landbot PM showed me the answer was dead simple: URL parameters. After approximately 50 hours of work, I had a functioning workflow: payment to professional PDF in under 10 minutes, costing £68/month to operate, with zero manual intervention.
I primed myself to start working one Friday and started fast. I wanted to make the most of free trials, so I spent about 50-60 hours in August – working my days off, evenings and weekends to build the workflow as fast as I could. There was one initial aim: take a payment, send an email with a secure token, validate the user, have a conversation with AI to extract the data, and put the data in a PDF which could be emailed to the user.
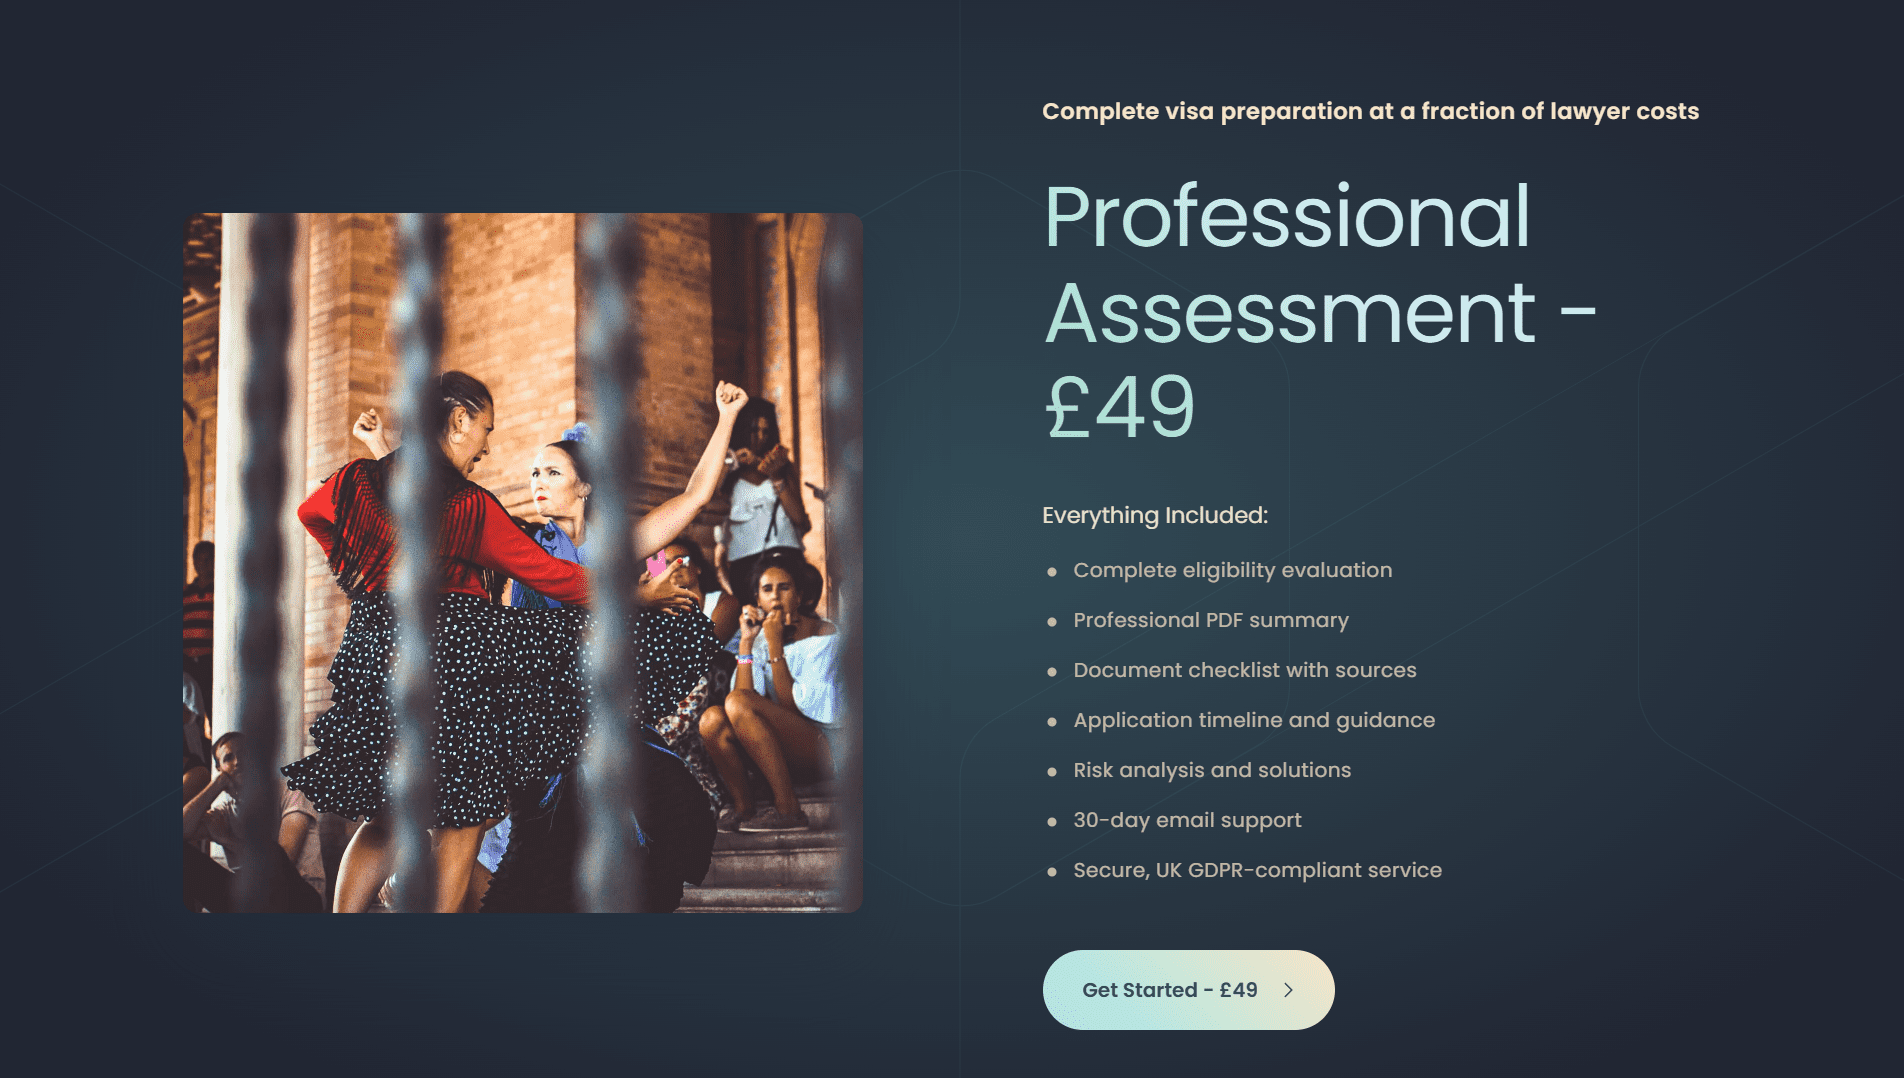
I started with the Carrd website. It seemed a logical place to start with the landing page, and I felt the hosting would be key, so I didn’t want to change this partway through the build if I ran into a blocker. I asked Claude to help with the copy. I didn’t want to get bogged down too much at this stage with working out how to present the page, and in less than two minutes Claude had given me enough copy for a website. I spent 5 minutes selecting a Carrd template and got to work.
Carrd is drag-and-drop and fairly easy to learn. Again, it wasn’t really on my core agenda to make a beautiful website, but with the copy Claude had provided, some photos of Spain I had selected from my Unsplash subscription and a bit of copy-and-pasting, I had a decent enough one-page website up and running after one hour. It was a lot more professional than I had intended, and so far so good – no code or development required.

The next step was to get the Stripe checkout working. I registered for a Stripe account; the longest part here was probably the registration. I didn’t read the instructions and again had Claude walk me through the basic items, using my initiative where the instructions didn’t quite match the UI. One key item is that I wanted to extract data from the user at point of purchase as I needed to create a Deal in Zoho CRM which would be the record to provide the validation and track the process.
So I worked on the checkout page and fiddled around with the custom fields. I was a little disappointed that I couldn’t customise the design of the page as much as I wanted, but I put this down to MVP and made a note to review that later, remembering the core goal for now was to deliver the minimum. I provided a payment complete message, created a product with a price and set up links to my company. Then I was given a payment link and all I needed to do was create a button on the website which takes the user to the Stripe payment page when clicked. So far so good – we have a website and a payment page.
The next step was to set up the CRM. I needed to have the structure in place before I started mapping the fields. This is where I ran into my first small problem. I had budgeted to use the free version of Zoho CRM but quickly found the functionality too limited to achieve any of my goals for the project. In hindsight, I think Zoho just offer this tier as a way for people to see the CRM and the capabilities as opposed to expecting users to use it for their processes. I was in a difficult position as I’ve used the full version for a client and know what the capabilities are. I kept running into small roadblocks every time a feature I wanted to use was not in the tier I paid for. I very quickly decided to upgrade.
For £16 a month, the product still fitted into the budget I had set aside and at this stage I didn’t want to invest time in something new to do the job. So I spent a few hours working with Claude to define the fields that I needed for the workflow. Again, remember at this point speed of delivering the MVP process was paramount – if I couldn’t generate a PDF with data gathered from an AI conversation, then the project was pointless. I hadn’t spent the time mapping out the workflow in huge granularity, so I had to have faith in what the AI was recommending.
Together we created customised Account, Contact and Deal records and a Sales Pipeline which the Deals require. Even though I had upgraded, I was still limited by the number of custom fields I could create and was working within these confines. I decided to create accounts and contacts as opposed to just deals so I could track repeat and returning customers. This was all triggered from the user’s email which is collected at the checkout. It wasn’t a necessity, but I felt that if this scaled then it would be worth setting up the architecture now.
After setting the fields for all of these modules, I moved on to the Make.com workflow. The trigger was the Stripe payment. I was completely new to Make and was relying on AI to give me detailed instructions about how to implement the workflow. The Stripe trigger was easy enough to set up, and then selecting further modules was simple in itself. I’ve used Zoho Flow and this follows the same principle of mapping values to fields from previous modules in the scenario. So long as a module has the required data and appears earlier, then everything will sync. I started with creating the Zoho CRM account, then contact and finally deals.
It took me a little while to get everything together and mapped, and this was all possible due to the JSON output of the Stripe trigger. However, I very quickly ran into my second blocker, which was the name of the user making the purchase. For some reason, I was only able to extract the first name from the mappings provided, which would cause me a problem, and I needed the name of the person along with the email to create the unique records in Zoho. After going around in circles, I knew I needed to create a formula in Make, but the problem I had was that the formulas Claude was providing didn’t work. After several hours of getting nowhere and trial and error, I sent an email to Make support and stopped for the day. I had already felt pretty productive and this was the only real issue. Lesson here is to know when to stop and when to keep pushing. Sometimes a good pause will yield better results than pushing until you are broken.
Make support wrote back the following day and provided me with the required formula. When I passed the response into Claude, Claude admitted that it had been sending me round the houses as it didn’t know how to write the formulas. I realised that Claude doesn’t always read the instructions and will keep suggesting answers not knowing if it is right. I spent an hour updating the AI knowledge with the Make.com instructions, and formulas in Make, although not always perfect first time, have not been above me. Essentially, I needed a formula to extract the two answers from the JSON provided by Stripe as they were provided as two sets. The Make.com UI does not automatically allow the selection of this, which is bad UI in my opinion, but nothing I can do there. The formula worked and then the rest fell into place.
I updated the Zoho modules to create a unique code, the timestamp of the purchase and to take the relevant data from the payment. In this session, I was very quickly able to create an account, contact record and deal, and then send the Deal ID and unique code via email. I of course set up the Gmail account at this point to facilitate the email sending, and this went without issue. I kept the email basic design-wise as I wanted to push on.
So a quick recap: I now have a website, a payment mechanism which acts as the trigger to create records in my CRM, and that then triggers an email to the user. The next step was to create a verification process – the part that happens when the user clicks on the link.

My selected AI platform is Landbot. Landbot is largely designed to deal with support or onboarding workflows, so it’s inherently open. I could host it in a link or an iframe, but there is no limitation to how users access Landbot within the product. My concern is that one person could pay for my service and then share the link. I also wanted to stop users hammering the AI, as in my initial package I had 100 conversations a month.
Working with Claude, we decided to use Zoho Creator. I wanted a no-code solution to deliver the workflow, but this was a waste of another 6 hours and I went down a rabbit hole. Again, make sure that the AI has access to the right instructions and knows what it is doing, or it has the tendency to optimistically guess. It started well either way, with Claude giving me good instructions, but halfway through setting up the piece I ran out of Claude credits and decided to progress with ChatGPT. This was before the Model 5 launch, but still 2 hours later I had made very little progress with ChatGPT. As I did many times on this project and with other projects, I found that without Claude my productivity ground to a halt. After I got Claude back, we made progress again, but the validation product looked so bad and the error messaging was terrible – even for an MVP – I decided to abandon this Zoho product. This is nothing against the product; it just was not working for my use case.
Claude convinced me to allow it to write JavaScript and set up a Carrd subdomain. I was dubious as I can’t write JavaScript and I don’t want to have too much code to manage, but within the limitations of my scope, stack and technical abilities, we decided this was the right approach. I set up a new Carrd website, created my first subdomain and started using the code segments of the website. It was a slow start as Claude wanted to make Carrd elements appear and disappear, which I think is not possible in Carrd. When Claude decided to handle it all via JavaScript and load the Landbot in an iframe, we made quick progress. The result wasn’t pretty, but it was effective.
As part of this process, we created a webhook and webhook response in Make – my first custom webhooks – which used the tokens in the URL to reject or validate the users. I introduced more pathways later on, which I will come to. With a bit of trial and error, Claude wrote the code and I was validating the user via the codes provided, checking them in Zoho CRM and displaying a rejection screen or loading the Landbot. And this is where I hit my biggest roadblock.
I needed the Landbot to pass on the details of the user so that we could email the user the final output PDF. Not only did I need to export the conversation, but I also needed to export the valid tokens provided in the link so I could validate the user’s details post-conversation. The problem: I couldn’t seem to work out how to pass the link tokens from the window url into the iframe. This wasn’t helped by my lack of JavaScript knowledge or knowing what was possible in Landbot or with JavaScript.
At this point, I thought Landbot would not work and I started researching new providers. This stalled the project for about a week whilst I registered for different products, tried to set them up as quickly as possible and test them. In the end, nothing worked in eh way I had wanted and I decided to return to Landbot with its limitations and new knowledge of knowing that it could accept values passed from the URL. The only issue is that I wasn’t sure how to achieve this. I had read in one of the onboarding emails that I could set up a call with the Landbot Product Manager and decided to give that a go.
On the call, the PM was able to answer and solve all of my questions. I had seen the Landbot agent working as a standalone device, but Landbot is actually more of a workflow with interconnecting scenarios than an Agent. I needed to create a non-AI bot to start the conversation; this bot would collect the details and then pass on to the agent and then post conversation the user us handed to a bot flow to complete the process. I was nearly blocked as my package didn’t contain webhooks, but there is a code block and I asked Claude to write me a JavaScript webhook call with the JSON payload that Make could then use. In Make, I created a new flow that would be triggered each time the webhook was called. This was the final step in the process!

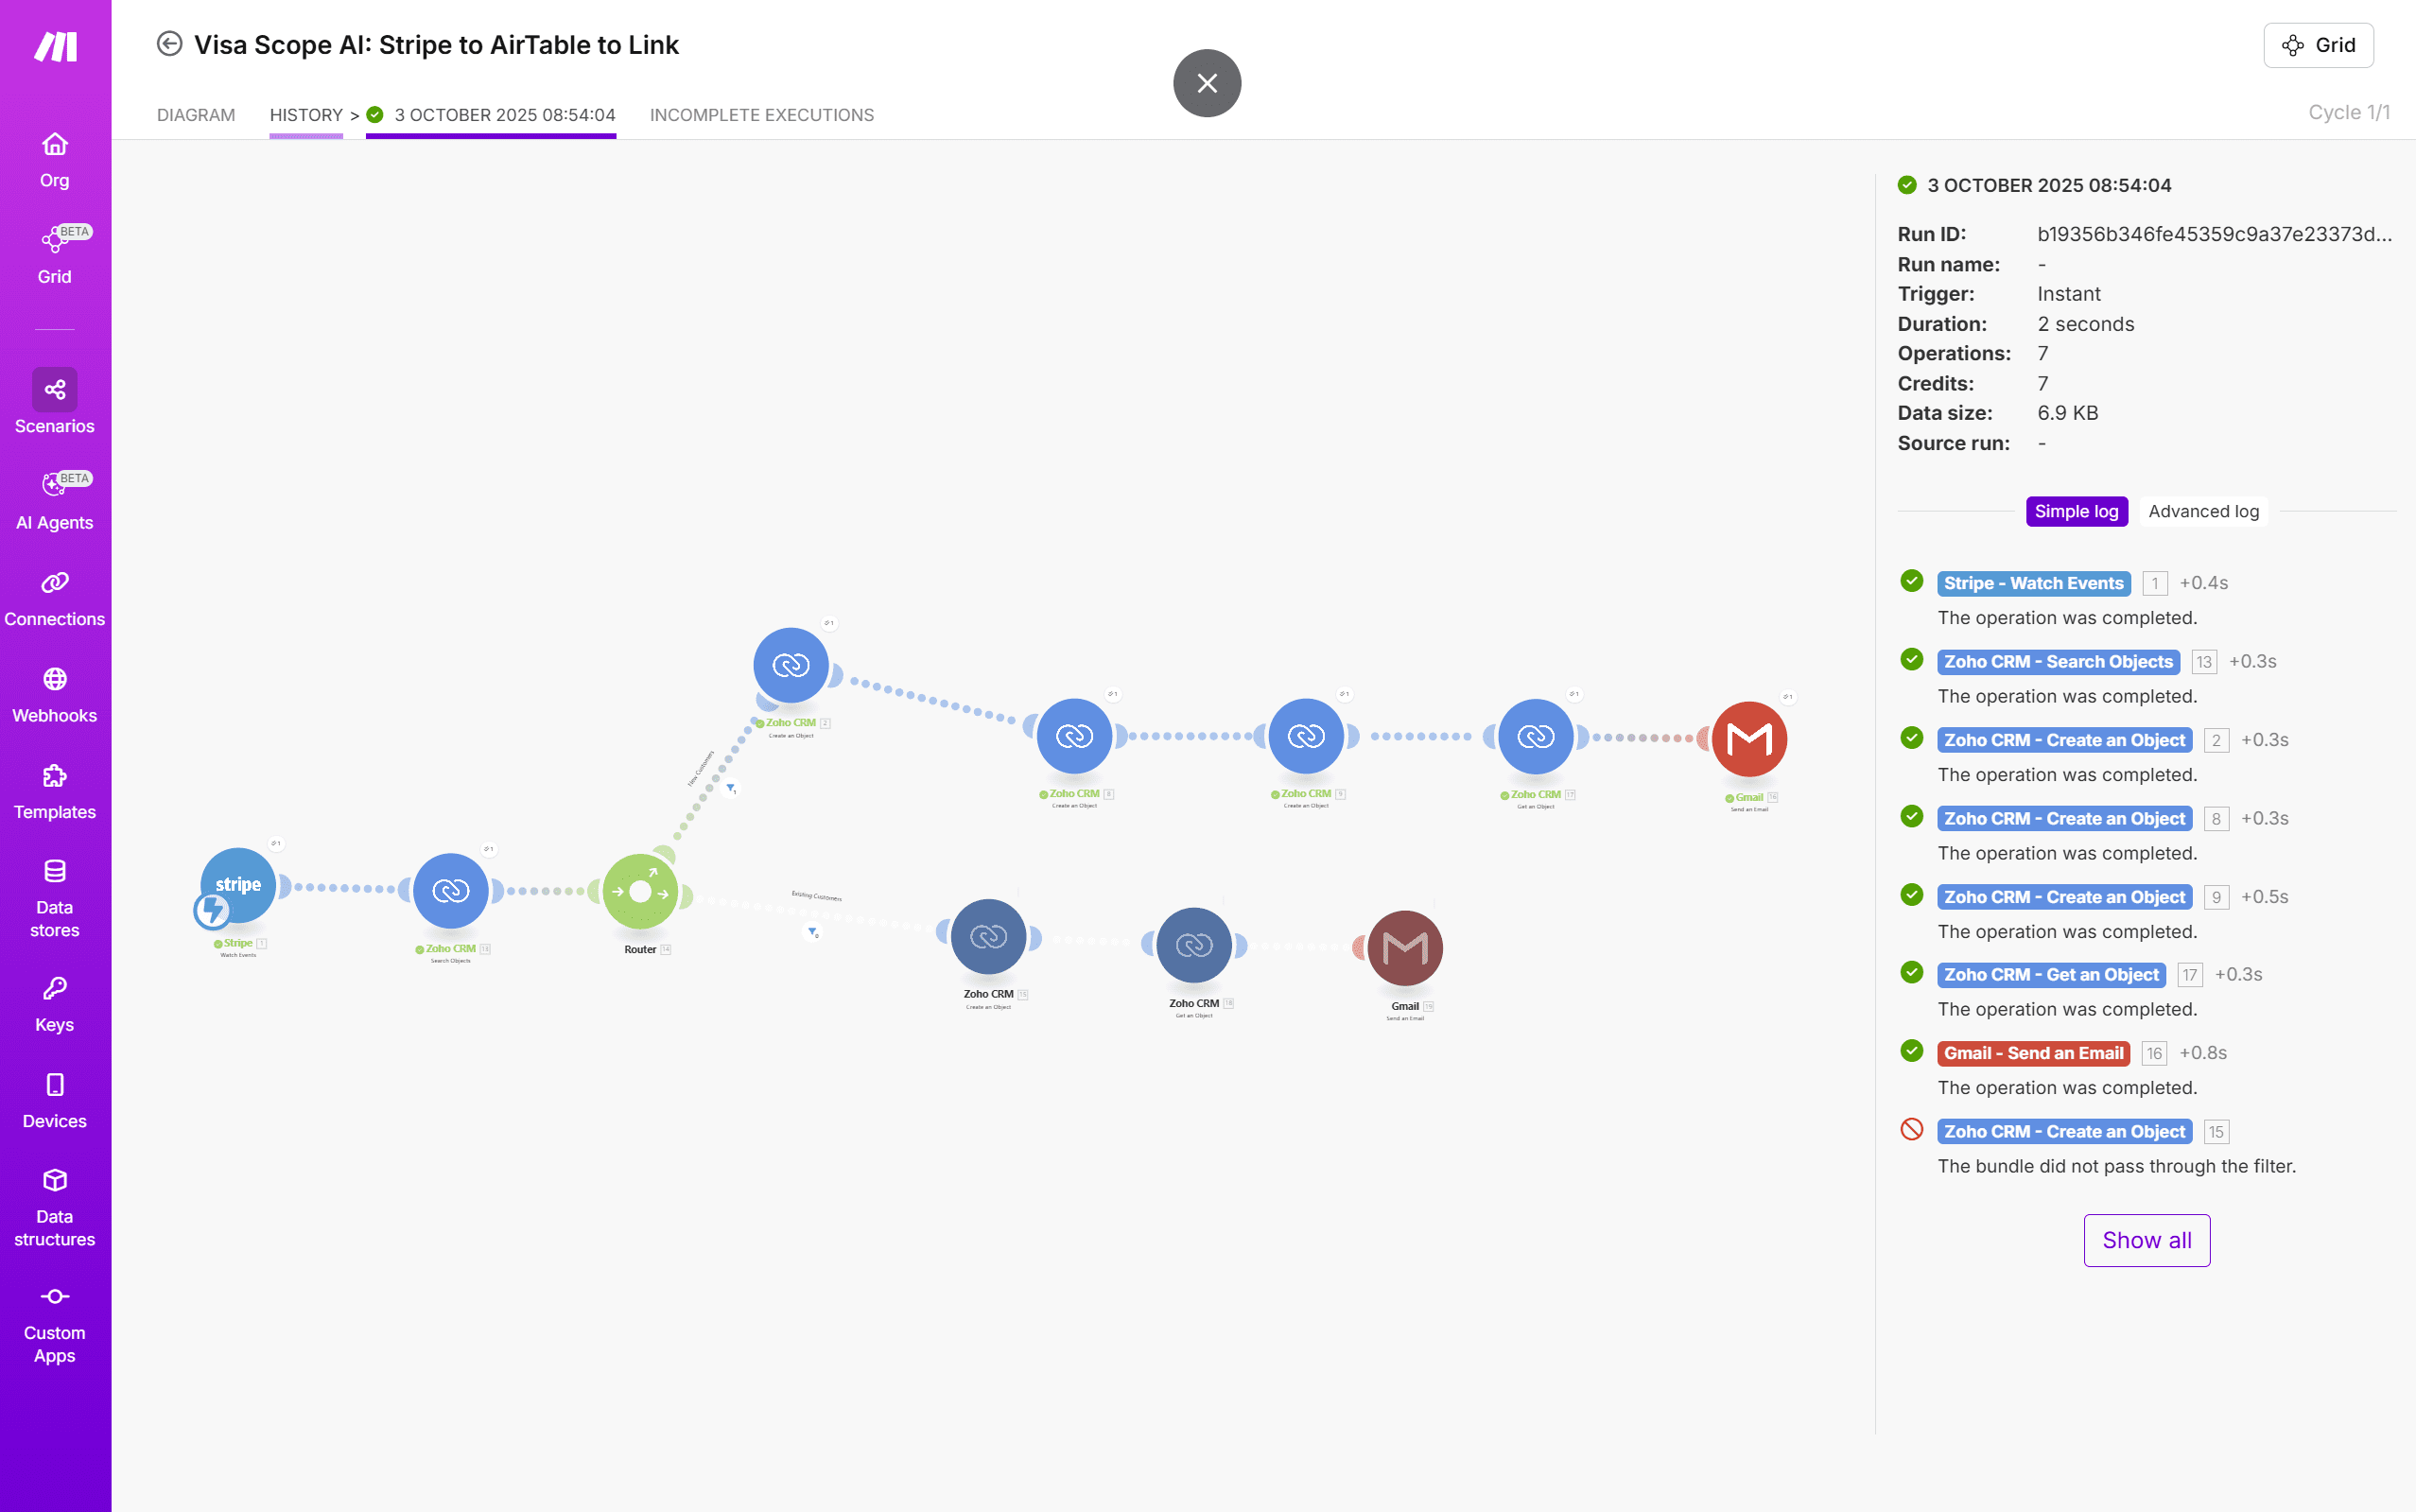
Once the data gathered in Landbot was passed to Make, the rest fell into place in a few hours. I had already decided to use Google Docs, so it was a case of playing with the modules in Make and getting them in the right order. I needed to update Zoho to record process completion the process was complete and that a PDF had been sent. Then I needed to generate a Google Doc using the Google Docs module, I could save this to Google Drive as a PDF using the Google Drive module, and I then needed another module to download the saved PDF so I could email it as an attachment. Here there was lots of trial and error in understanding what each module needed, but I moved fairly fast without any blockers. And soon I achieved my MVP, which I was really proud of. I had a conversation with AI and produced a PDF with that information and emailed it to the user. So far this had taken me around 50 hours of trial and error and still needed a lot of work. But I had my first AI workflow and had validated my goal.
After approximately 50 hours over 4 weeks in August, working evenings and weekends, I had:
Complete 7-System Integration: Carrd → Stripe → Make.com → Zoho CRM → Gmail → Landbot → Google Docs/Drive – all working seamlessly without manual intervention
End-to-End Automation: From payment to professional PDF delivery in under 10 minutes, completely zero-touch
Security Architecture:
24-hour token expiry (balancing user convenience with security)
One-time use tracking (token marked as used after assessment completion in Zoho CRM)
Multiple validation states via JavaScript gateway (valid/expired/used/invalid)
Professional Output: A £49 price point delivering professional-quality documentation customers could trust, generated from Google Docs templates
Economic Validation:
Monthly Operating Cost: £68 (Carrd £1.58, Landbot £36, Make.com £15, Google Workspace £6, Zoho CRM £0, plus Stripe variable fees)
Customer Price: £49
Break-Even: 2 customers per month
I’d proven that no-code/low-code platforms could deliver a professional, automated, revenue-generating product. This validation workflow—payment processing, secure token generation, CRM integration, and automated PDF delivery—is the same pattern I’ve implemented multiple times for different use cases. The specifics change (visa assessments vs event registrations vs customer onboarding), but the approach is repeatable: understand the business problem, select platforms that fit the budget and technical constraints, build the integration, test until it works. What took 50 hours to build from scratch now takes days to adapt because I understand how these systems connect. This is what I do for Product Scope clients—turn manual processes into automated workflows without requiring development teams or six-month projects.
Next Steps
The next step, which I will cover in Part 3, was to finesse the whole process:
– Update the checkout experience
– Finesse the entire workflow to allow for token resends
– Identify repeat customers and finesse Zoho CRM
– Test and fix bugs
– Update design in emails
– Update PDF design
– Improve design of token validation pages and increase the scenarios
– Create privacy policies
– Ensure GDPR compliance
– Add additional security
– Improve the conversation
But for now, I’d proven something important: with the right combination of platforms, AI assistance, and persistence through technical challenges, it’s possible to build a professional AI-powered product without writing significant amounts of code or hiring developers. The journey from “dubious about no-code” to “working AI legal assistant” had validated my goal.